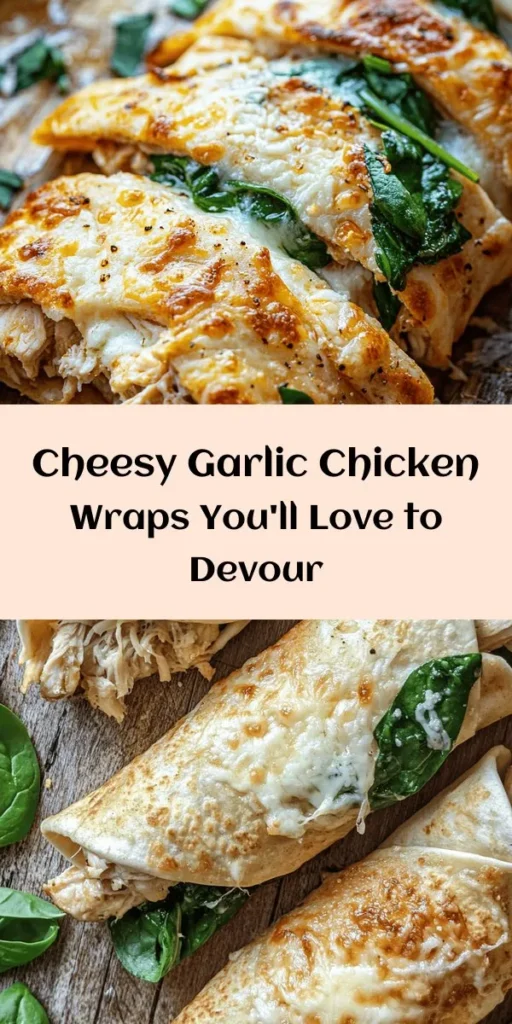
Introduction
If you’re on the hunt for a meal that strikes the perfect balance between convenience and flavor, look no further than Cheesy Garlic Chicken Wraps. These wraps are not only a crowd-pleaser but also a versatile option that can fit into a variety of dining scenarios, from busy weeknights to casual gatherings with friends. The ease of preparation means you can whip these up in no time, making them a go-to choice for those moments when you’re short on time but still want a delicious homemade meal.
The appeal of Cheesy Garlic Chicken Wraps lies in their mouthwatering flavors and adaptability. You can customize the fillings based on your preferences, whether you’re a fan of spicy kicks or prefer a milder taste. The combination of tender chicken, melty cheese, and savory garlic creates a dish that’s satisfying and comforting, while fresh vegetables add a burst of color and health benefits. Best of all, the ingredients are typically readily available in most kitchens, making it easy to throw together this delightful wrap when hunger strikes.
In this article, we will guide you through the process of making Cheesy Garlic Chicken Wraps, from understanding the key ingredients to preparing and assembling the wraps. Whether you’re cooking for yourself or entertaining guests, these wraps will surely impress with their deliciousness and ease of preparation.
Understanding the Ingredients
Before diving into the cooking process, let’s take a closer look at the primary ingredients that make these Cheesy Garlic Chicken Wraps so irresistible. Understanding each component will help you appreciate the flavors and textures they bring to the dish.
Cooked Chicken
The star of this wrap is undoubtedly the cooked chicken. While you can use any type of cooked chicken, rotisserie chicken is a fantastic option for its convenience and flavor. Not only does it save time, but the spices and seasonings used in rotisserie chickens add an extra depth of taste to the wraps. Simply shred or chop the chicken as needed, and you’ll have a delicious base for your filling.
Cheese Varieties
Cheese plays a pivotal role in elevating the flavor and texture of the wraps. For this recipe, we recommend using a combination of mozzarella and Parmesan cheese. Mozzarella provides that delightful stretchiness and creaminess that we all love in cheesy dishes, while Parmesan adds a sharp and nutty flavor that complements the other ingredients beautifully. This combination ensures that every bite is packed with cheesy goodness.
Cream Cheese
To achieve a rich and creamy filling, cream cheese is a must. It acts as the glue that holds the chicken and other ingredients together, creating a luscious texture that enhances the overall mouthfeel of the wrap. The creaminess of cream cheese also balances out the savory flavors of the garlic and chicken, making each bite a comforting experience.
Garlic and Italian Seasoning
Garlic is a key ingredient in this recipe, infusing the wraps with its aromatic and robust flavor. Its pungent essence pairs perfectly with the cheesy filling, creating a savory profile that tantalizes the taste buds. Additionally, Italian seasoning—a blend of herbs such as oregano, basil, and thyme—adds a layer of complexity and brings a hint of Mediterranean flair to the wraps. These ingredients work harmoniously, creating a flavor explosion that’s sure to please.
Fresh Spinach and Tomatoes
To add a nutritional boost and a pop of freshness, fresh spinach and tomatoes are included in the wraps. Spinach is packed with vitamins and minerals, while tomatoes provide antioxidants and a burst of juiciness. These vegetables not only contribute to the nutritional value of the wraps but also enhance the visual appeal, making the dish more vibrant and inviting.
Alternative Ingredients
One of the best aspects of Cheesy Garlic Chicken Wraps is their adaptability to various dietary preferences. For those following a gluten-free diet, consider using gluten-free tortillas to keep the wraps safe for consumption. Additionally, if you’re looking for a dairy-free option, there are many plant-based cheese varieties available that can mimic the taste and texture of traditional cheese, allowing everyone to enjoy this delightful meal.
Preparation Steps Explained
Now that we’ve explored the key ingredients that contribute to the deliciousness of Cheesy Garlic Chicken Wraps, it’s time to dive into the preparation steps. We’ll break down the process to ensure that you can achieve perfect wraps every time.
Preheating the Oven
Before you start mixing and assembling, it’s essential to preheat your oven to the right temperature. Preheating ensures that your wraps will cook evenly and develop that crispy, golden exterior. Set your oven to 375°F (190°C) and let it heat up while you prepare the filling. This step is crucial for achieving that perfect texture that everyone loves in wraps.
Preparing the Filling
With the oven preheating, it’s time to prepare the filling. In a large mixing bowl, combine the shredded rotisserie chicken, mozzarella cheese, Parmesan cheese, cream cheese, minced garlic, and Italian seasoning. Using a spatula or a wooden spoon, mix the ingredients thoroughly until they are well combined. It’s important to ensure that the cream cheese is softened to room temperature, as this will make it easier to blend with the other ingredients.
Consider tasting the mixture at this stage to see if you want to adjust any flavors. If you prefer a stronger garlic flavor, feel free to add more minced garlic, or if you enjoy a hint of heat, a pinch of red pepper flakes can elevate the dish further. Once you’re satisfied with the flavor, fold in the fresh spinach and diced tomatoes gently to maintain their texture.
Assembling the Wraps
Now comes the fun part—assembling the wraps! Start by laying out your tortillas on a clean surface. Depending on the size of your tortillas, you may want to use larger ones to accommodate the filling better. Take a generous scoop of the filling and place it in the center of each tortilla, leaving enough space around the edges for folding.
To assemble the wrap, fold in the sides of the tortilla over the filling, then roll it up tightly from the bottom to the top. This technique ensures that all the delicious filling stays securely inside. If you’re worried about spillage, consider using a toothpick to hold the wrap together or wrapping it in parchment paper for easier handling.
Tips for Rolling Techniques to Prevent Spillage
Rolling wraps can be tricky, especially when filled to the brim with tasty ingredients. Here are a few tips to ensure that your wraps hold together beautifully:
– Don’t Overfill: It’s tempting to pack as much filling as possible, but overfilling can lead to messy wraps. Stick to a moderate amount of filling for easy rolling.
– Tight Roll: Make sure to roll the tortillas tightly to prevent them from unrolling during cooking. A snug wrap will keep all the flavors contained.
– Secure the Ends: As you roll, tuck in the sides of the tortilla to create a sealed pocket. This will help prevent any filling from escaping.
Brushing with Olive Oil
Before placing your wraps in the oven, don’t forget to brush the tops with a little olive oil. This step is crucial for achieving that golden, crispy finish that everyone loves. The olive oil not only adds flavor but also helps the wraps crisp up beautifully while baking. If you prefer, you can also sprinkle a bit of garlic powder or Italian seasoning over the brushed oil for an extra flavor boost.
With the wraps assembled and brushed with olive oil, you’re ready to bake them to perfection. Place the wraps on a baking sheet lined with parchment paper, ensuring they are spaced out to allow for even cooking.
Stay tuned for the next section, where we’ll discuss baking time, serving suggestions, and pairing ideas that will take your Cheesy Garlic Chicken Wraps to the next level!

Baking the Wraps
After assembling your Cheesy Garlic Chicken Wraps, it’s time for the crucial baking step that transforms your ingredients into a delightful, golden, and crispy meal. Preheat your oven to 375°F (190°C). This temperature is optimal for ensuring the wraps become crispy on the outside while the fillings heat through perfectly.
Baking Times and Temperature
Place the assembled wraps seam-side down on a baking sheet lined with parchment paper. This will help prevent sticking and ensure easy cleanup. Bake the wraps in the preheated oven for approximately 15 to 20 minutes. During this time, the cheese will melt, and the tortilla will develop a beautiful golden-brown color.
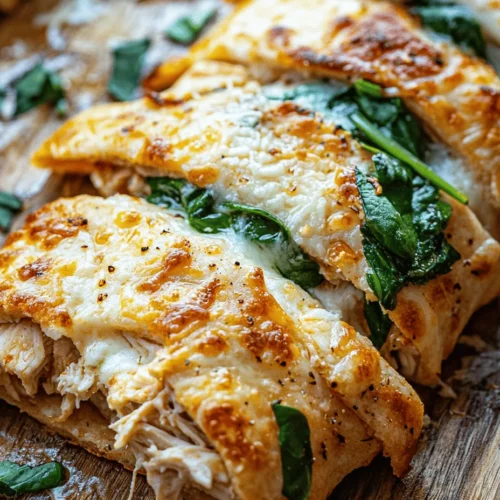
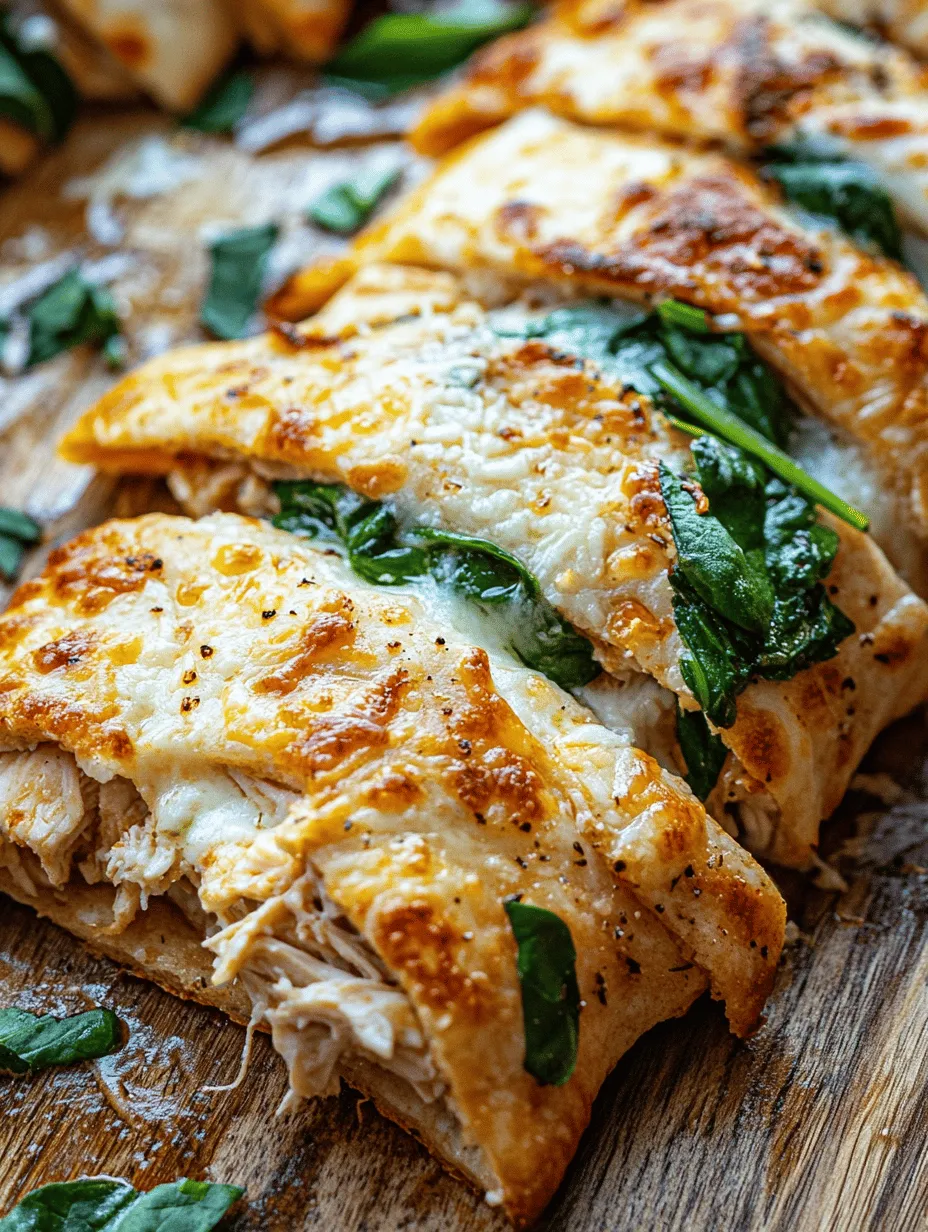
Visual Cues During Baking
One of the best indicators that your wraps are ready is their color. Look for a rich, golden hue on the outside of the tortilla, which signifies that they have achieved a delightful crispness. Additionally, you’ll notice the cheese bubbling out slightly from the sides, which is a clear sign that the insides are heated perfectly. If you prefer an extra crunch, you can broil them for the last couple of minutes—just be sure to watch them closely to avoid burning.
Letting the Wraps Cool
Once your wraps are baked to perfection, remove them from the oven and allow them to cool for a few minutes. This step is essential; letting the wraps rest slightly before slicing will make them easier to handle and help prevent the filling from spilling out. After about five minutes, slice them into halves or thirds, depending on your serving preference, and prepare for a flavorful feast.
Serving Suggestions
The beauty of Cheesy Garlic Chicken Wraps lies not only in their flavor but also in their versatility. Here are some delightful serving suggestions to enhance your meal:
Dips and Sauces
Pair your wraps with a variety of dips to elevate the taste experience. Classic options include:
– Ranch Dressing: The cool, creamy texture complements the warm, cheesy filling.
– Marinara Sauce: A tangy marinara adds a delicious Italian flair and works beautifully with the garlic flavors.
– Garlic Aioli: For those who crave more garlic, a homemade or store-bought garlic aioli can take your wraps to the next level.
Side Salads and Complementary Dishes
To round out your meal, consider serving the Cheesy Garlic Chicken Wraps with a fresh salad. Here are a few ideas:
– Caesar Salad: A classic Caesar, with crunchy romaine, creamy dressing, and crispy croutons, pairs well with the wraps.
– Mediterranean Salad: A light salad with cucumbers, tomatoes, olives, and feta cheese provides a refreshing contrast to the warm, cheesy wraps.
– Coleslaw: A tangy coleslaw can add crunch and acidity, balancing the richness of the wraps.
Nutritional Information
Understanding the nutritional aspects of your Cheesy Garlic Chicken Wraps can help you appreciate their health benefits while enjoying delicious flavors.
Breakdown of Calories and Macronutrients
Each serving of Cheesy Garlic Chicken Wraps contains approximately 350-400 calories, depending on the specific ingredients used. Here’s a general breakdown:
– Protein: About 25-30 grams, primarily from the chicken and cheese.
– Carbohydrates: Around 30-35 grams, mainly from the tortilla.
– Fats: Approximately 15-20 grams, largely from the cheese and any added oils or dressings.
Health Aspects
This dish not only satisfies your taste buds but also offers nutritious benefits. The protein content from the chicken supports muscle maintenance and repair, while the inclusion of vegetables adds essential vitamins and minerals. By opting for whole-grain tortillas, you can increase fiber intake, promoting better digestion and sustained energy levels.
Variations and Customizations
One of the most exciting aspects of Cheesy Garlic Chicken Wraps is their flexibility. Here are some creative ideas for customizing this recipe to suit your taste:
Swapping Proteins
If you’re in the mood for something different, try swapping out chicken for other proteins:
– Turkey: Lean turkey works wonderfully and offers a slightly different flavor profile.
– Beef: Ground beef can provide a heartier option; consider seasoning it with taco spices for a twist.
– Vegetarian Options: For a meatless version, use black beans, lentils, or tofu, seasoned well to ensure a packed flavor.
Adding Different Vegetables
Incorporate various vegetables to boost the nutritional value and add texture:
– Bell Peppers: Sautéed bell peppers bring a sweet crunch.
– Mushrooms: Their earthy flavor pairs well with garlic and cheese.
– Zucchini: Grated or thinly sliced, zucchini can add moisture and nutrients without overpowering the dish.
Modifying Spices for Unique Flavors
Experimenting with spices can create entirely new flavor profiles. Consider these options:
– Spicy: Add red pepper flakes or jalapeños for a kick.
– Smoky: Smoked paprika or chipotle can infuse a smoky depth.
– Herbaceous: Fresh herbs like cilantro, parsley, or basil can add brightness and freshness.
Conclusion
Cheesy Garlic Chicken Wraps are not only easy to prepare but also incredibly delicious, making them a fantastic addition to your meal rotation. With their crispy, cheesy exterior and savory filling, they are sure to be a hit with family and friends alike.
Encourage your culinary creativity by experimenting with the recipe—try different proteins, vegetables, or spices to make it your own. The flexibility of this dish allows it to cater to various tastes and dietary preferences, ensuring it can be a staple for any occasion.
So, gather your ingredients, preheat your oven, and get ready to enjoy a dish that combines comfort and flavor seamlessly. Whether it’s a quick weeknight dinner or a fun gathering with friends, Cheesy Garlic Chicken Wraps are sure to bring smiles to the table.